Get To Know Your Camera
With all the amazing photo ops in Alaska, it's common for first-time visitors to pack a brand new SLR camera for their trip. Before you start falling back on your point-and-shoot ways, take a few minutes to get to know your camera's features in ways that make it more Alaska-friendly.
Switch quality modes
You'll probably want to make print enlargements of your best Alaska shots. If you're in a situation that you think is worthy of this, use the highest quality settings. If the camera has a RAW mode, use that. We (at Alaska.org) usually shoot the largest size and highest resolution JPG by default, then switch to RAW when we find a scene we're really excited about. RAW has the advantage of 1) greater resolution, and 2) more ways to enhance the image in post (e.g. change exposure settings up to 2 stops up or down, change white balance, etc..) It has the disadvantage of taking up more space on your memory card.
Control aperture and shutter speed
Either through using the shutter priority, aperture priority, or full manual mode.
- Shutter speed: You'll want a faster shutter speed (1/250th, 1/500th or more) to stop action or fast moving objects. If you go on an Alaska flightseeing tour, be sure to shoot at 1/125th or above. Use a slower shutter speed (such as 1/30th or 1/15th) to blur rivers or waterfalls, or to create the sensation of speed while panning.
- Aperture: Narrow depth of field (low aperture numbers such as 2.8 or 4.0) is useful to isolate foreground objects from distracting backgrounds, such as when taking photos of flowers or people. Wide depth of field (f11 or f16 or higher) is useful when you want the entire scene to be in focus, from near foreground objects to distant background objects.
- ISO speeds: You may need to change your ISO settings to get the shutter and aperture combination you like. For example, in a dusky situation where you want 1/60th or faster shutter speed and f11 or higher aperture, you might discover there isn't enough light at 100 ISO. In this case, increase your ISO. Every doubling of the ISO number gives you another stop of either shutter or aperture. An easy way to bypass all this is just to use the camera's automatic mode. It will probably choose a higher ISO speed for you automatically. You may want to take manual control of ISO, however, since higher ISO settings result in grainier images. It's only really noticeable above 400 or 800 ISO.
Flash photography
We seldom use a flash anymore, even when shooting indoors. We crank our camera even up to ISO 1600 and use natural light. First, it's a convenience not to have to carry a flash. (We'd rather carry an extra lens.) Second, natural light looks better. The only downside: you will see some grain in the finished photo.
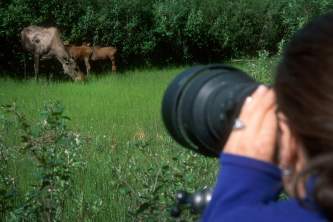
Have you thought about a telephoto lens?
You really need it for wildlife.
Bring at least one extra battery and enough memory cards.
How much is enough depends on how much you shoot. When headed out for a long weekend, we carry enough cards to store 250 of the highest quality RAW images. That translates into thousands of JPGs. That's probably overkill for most people. Your owners' manual or camera can tell you how many images you can fit onto a given size memory card.
Principles of Art and Composition
Knowing your camera is half the battle. The other half is knowing how to make great images. We put together a video tutorial with Clark Mishler, one of the nation's top photographers, to help Alaska visitors just like yourself make great Alaska photos. It's 13 minutes long and covers a dozen or so composition and other techniques to inspire you and help you spot extraordinary photo opportunities that you might otherwise miss. Here's our tutorial on Alaska photography.