Photographing the Northern Lights
Want to Photograph the Northern Lights? We’ll Tell you How!
With the right equipment and a bit of patience, you can capture unique and stunning images of this iconic natural phenomenon. This guide covers everything you’ll need, including camera settings, equipment recommendations, and tips for planning your shoot.
Preparing to Photograph the Northern Lights
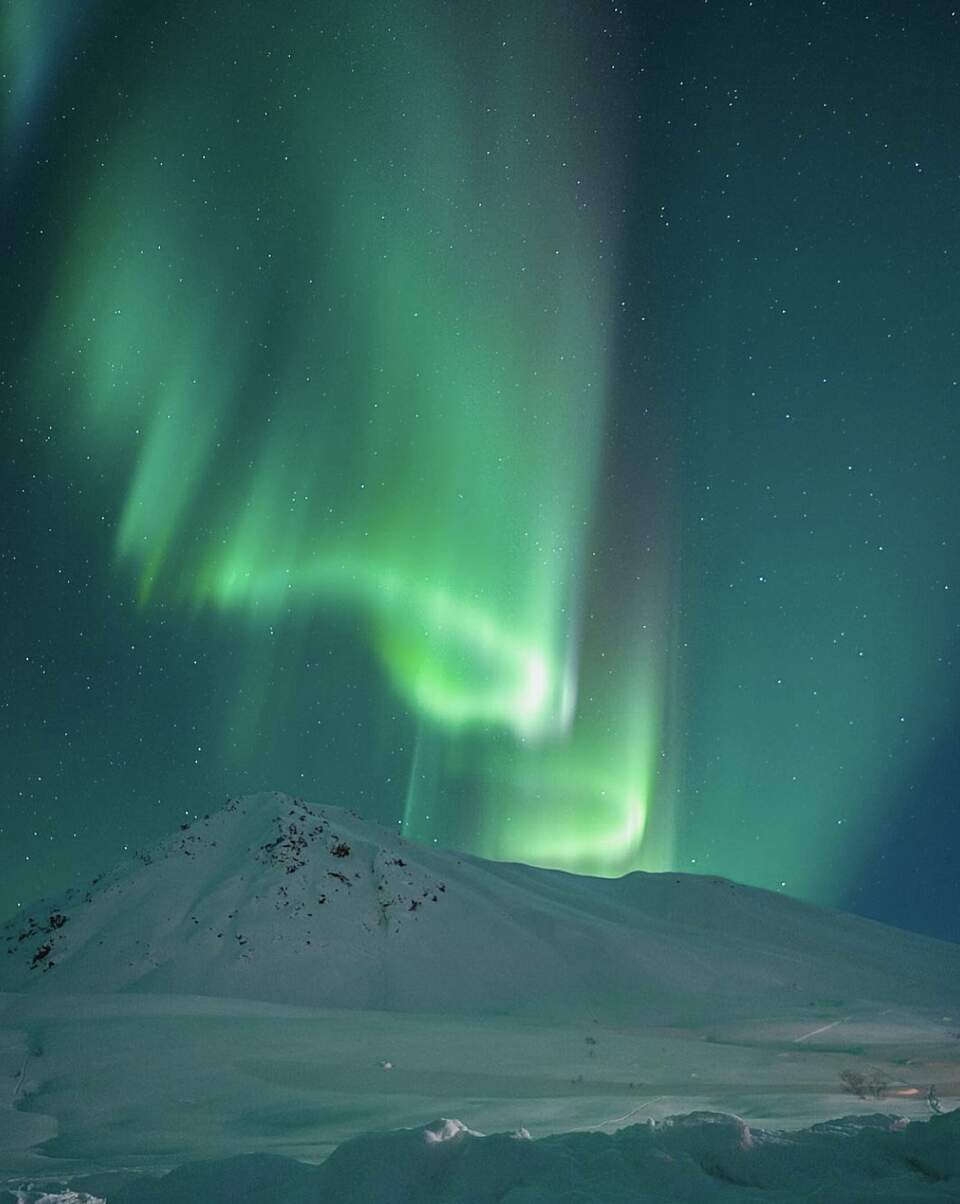
Photo by Jack Ouellette
1. Research the best times to view the northern lights in Alaska, usually from late August through early April.
2. Find a location with a wide, open view of the night sky. The further away from buildings and light pollution, the better.
3. Dress warmly. Temperatures in Alaska can drop to below freezing during the winter, so make sure to dress in layers.
4. Bring a tripod to keep your camera steady during long exposures.
5. Set your camera to manual mode.
6. Use a wide-angle lens to capture the vastness of the sky.
7. Bring a flashlight or headlamp to help you see in the dark and make minor adjustments to your camera settings.
8. Bring extra batteries! Freezing temperatures can quickly drain a full battery, and waiting for the lights to appear can take a long time. You don't want to run out of battery power before getting the shot you want.
9. Take some test shots before the northern lights appear to determine the best settings for your camera.
10. Have fun and enjoy the show!
What Camera Equipment Should I Bring?
To get the best photos of the northern lights, you will need a DSLR or Mirrorless camera equipped with a wide-angle lens and a sturdy tripod. You will also need a camera that is capable of capturing long exposures (at least 15-30 seconds). A remote shutter release cable is also recommended to minimize camera shake and to help you capture longer exposures. Additionally, you may need to invest in a special filter to help reduce the effects of light pollution. Finally, a fast lens (f/2.8 or faster) will help you capture the most vibrant colors of the northern lights.
What About My Smartphone, Can I Use It?
While professional cameras can capture the phenomenon in greater detail, it is still possible to capture beautiful images using a smartphone. Access your smartphone's camera app and locate the night mode feature. Night mode helps capture better details, reduce noise, and improve overall image quality. It's crucial to keep your smartphone stable during long exposures, so consider using a tripod or find a stable surface to rest your phone on. In night mode, your smartphone will automatically adjust exposure settings such as ISO and shutter speed. However, some devices allow you to manually control these settings. Experiment with different exposure settings to achieve the desired result.
What Camera Settings Should I Use?
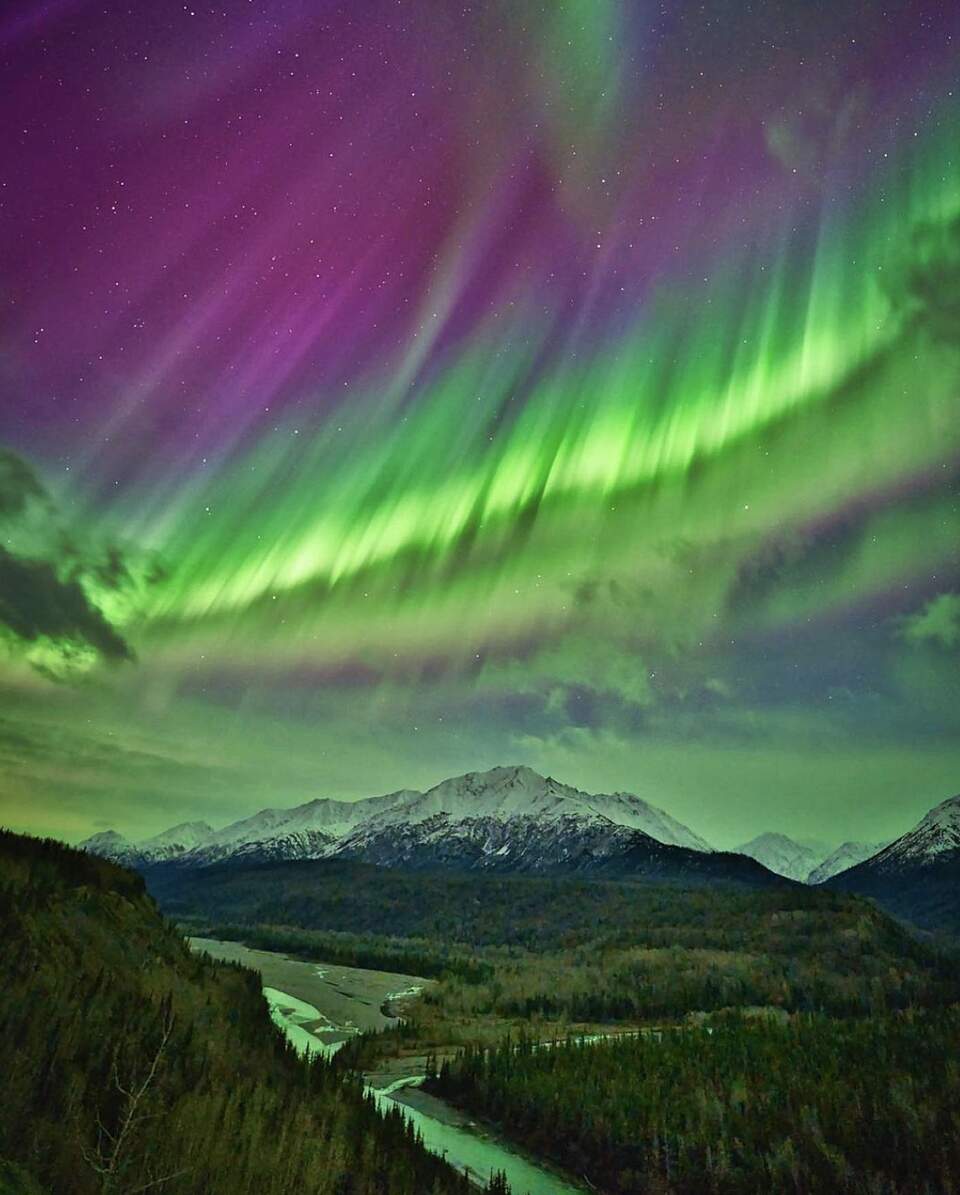
Photo by Jacob Cohen
The best camera settings for photographing the northern lights depend on the type of camera you have and the specific conditions of the night sky. Generally, it is recommended to use a high ISO setting (starting at 800 for bright lights or 1600 for dimmer lights) and a slow shutter speed (starting at 8-15 seconds). It is also important to use manual focus and turn off any automatic white balance settings. Experiment with different exposure settings to get the desired results.
Taking your Photographs
Choose a clear night with no cloud cover. Set your camera on a solid tripod to avoid camera shake. If possible, try to include a foreground element in your composition to give a sense of scale. Set your lens to infinity, or manually focus on a star in the night sky for crisp and focused images. Be sure to set your file type to RAW to capture as much data as possible.
What about Post-Processing?
Begin by bringing up the shadows and highlights of the photo to balance the exposure. Adjust the white balance to make sure the colors of the northern lights stand out and look natural. Increase the vibrance and saturation of the colors and add contrast to make the photo pop. Tweak the clarity of the photo to make the stars and northern lights stand out. If you want to make the photo more dramatic, you can add a color grade to give it a cool or warm tone. Finally, sharpen the photo to make the stars and northern lights stand out.