Alaska Campfire Tips
There’s something primal about a campfire. The dancing flames, the flush of warmth, the circle of friends and family leaning close. The crackle and spectacle of burning wood begs for story time and relaxation. It climaxes a day spent outdoors like nothing else.
Longtime Alaskans love campfires—winter and summer. And you will too! We have some tips . . .
Where and when can you build a campfire?
- Unless state or federal authorities have called a burn ban due to wildfire danger, you can build campfires almost any time of year in official campgrounds and other locales that feature gravel or sandy ground. (Like shorelines, gravel pits and river bars.)
- Backyard fires inside cities must follow local rules. In Anchorage, check the muni's daily burning alert and recreational fire details.
- Look for an existing fire ring or stone circle and use it. If creating a new fire pit (not recommended!), scrap surface material down to mineral soil and sweep away needles and litter. Never build a fire within eight feet of burnable vegetation or duff.
- If camping in a locale without fire rings, consider bringing a portable metal container. A fire pan will both protect the ground from getting scorched and keep the fire from sucking moisture, which will cool it off and make it smoky. (These pans can be essential for snow-season, frozen-ground fires.) During dry spells and in some places, an open campfire on the ground might be prohibited but a fire in a portable metal container will be allowed.
- These portable fire pits are sold by outdoor and home improvement stores. But you can easily make your own. Try a metal gold pan or metal hubcap, or cut off the bottom of a metal barrel about six or eight inches up. Even old, gnarled baking or broiler sheets from the home kitchen will work. Fire pan tip: Place two metal rods or pieces of wood on the ground parallel to each other. Then set your fire pan on top of these supports. If your pit has walls—like the bottom of a barrel—punch holes around the bottom of the walls for ventilation.
Where shouldn’t you build a fire?
- Most backcountry and tundra areas managed by government agencies (like state and federal parks) prohibit open fires outside of gravel bars or established campsites. Chugach State Park, for instance, has fairly strict campfire rules. Always check with the managers of the area you’re visiting.
- Even if there are no rules for your particular campsite, it’s considered bad form to pioneer a new campfire in tundra or in fragile vegetation. There are gobs of existing fire pits out there.
- Alaska is vast. In most unofficial camping areas, no one will be watching. If you decide to build a fire during the dry season when fires have not been completely banned, be disciplined, extremely careful and follow these guidelines from BLM.
Safety concerns and etiquette . . .
- Keep a bucket of water nearby to douse accidental spot fires triggered by floating embers.
- Never leave your fire alone! Many damaging wildfires have started from unattended campfires.
- At the end of the evening, use that water to soak the last embers and then stir them up in the ash and dirt. A dead fire will be cool enough to touch.
- The morning after, pick up any foil, plastic or unburned stuff still inside the fire pit. Leave it only natural material in the pit.
What about wood?
- Campfires don’t work without dry wood! Green (still alive) or wet wood either won’t burn or will smolder and produce choking smoke. It also can be difficult to find enough firewood within an easy stroll of campsites inside popular campgrounds.
- Quickest and easiest solution: Buy bundles of split, seasoned firewood. These items are sold at gas stations, grocery stores and in campgrounds all over Alaska. Usually spending $5 to $10 will provide enough wood for a decent evening fire.
- Gather your own: Search for dead, downed wood at least 100 feet off the road inside publically owned land. A camp saw will be helpful if not essential.
- Agencies sometimes urge people to avoid harvesting standing dead trees because they may provide wildlife habitat. In practice, campers often cut small-diameter snags because they are often the driest and most burnable wood. Don’t cut a nesting tree, no matter how small.
- Public or personal use firewood gathering areas may be convenient to your camping itinerary and offer a chance to stock up on larger quantities. Check with the Alaska Division of Forestry, Chugach National Forest or the Bureau of Land Management.
A great campfire in four easy steps
First, gather your tinder
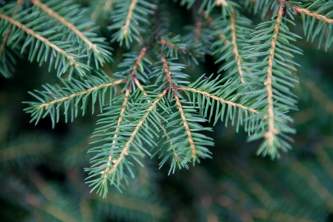
- Look for dry twigs from dead branches on the underside of spruce trees. (If they make an audible snap when broken—versus bending—they will burn.) These twigs should be smaller in diameter than a wooden kitchen match. Make a dense bundle as large as your fist.
- Dry birch bark from a dead, downed tree also burns extremely fast and hot from a single match. Tear the bark into strips.
- Bring your own—shredded newspaper or strips of non-coated cardboard work best. Make a fist-sized wad.
Second, gather your kindling
- Start with sticks or twigs about the diameter of your little finger. They should snap sharply when broken. Dead branches on the underside of spruce trees often work great. During clear weather, you can find dry twigs (often birch, willow or alder) scattered on the forest floor.
- If you have a camp-ax or maul, split kindling from a pre-cut log or unpainted and untreated scrap lumber into small sticks.
- Include a few pieces that are larger diameter in this bundle—like the size of a closet rod. These will help advance the intensity of the fire so that it will ignite the larger wood.
Third, stockpile the main wood
- Look for sources that are easy to saw up—often branches on large trees that have toppled and dried out. Never cut anything with leaves, buds or green needles.
- Saw three or four pieces that are no larger in diameter than a baseball bat into 18-inch lengths.
- Saw another six or eight pieces that are three to five inches in diameter. In summer weather, three large pieces of wood will generally last 40 minutes to an hour.
- If you can, split some of the larger pieces with an ax or maul. Split wood burns more readily.
Finally, build your fire
- Lay one of the large pieces of wood inside the pit. (Use one of the split pieces if possible.) Prop the bundle of tinder and/or birch bark against it. Light a match or lighter, and slowly insert the flame beneath the bundle from the side. Allow the flame to rise into the bundle and ignite it.
- As this fire starts growing, lay kindling one piece at a time around the flames in a tipi shape. Start with the smallest diameter sticks and work toward larger. Crisscross the pieces so that there are gaps. A fire wants to breathe!
- Keep adding kindling, forming that tipi shape, until it’s burning strongly and starting to create coals. You want this base to be hot so that the larger diameter wood catches and burns cleanly with less smoke.
- Begin adding the larger wood, one piece at a time, beginning with the smallest diameter pieces. Take your time and enjoy the process.
- Maintain the fire by crisscrossing additional pieces across and to the side of the coals, almost like you’re building a model log cabin with the sticks.
- Don’t add too much wood too fast! There’s a lag time before wood becomes fully ignited.
- A rule of thumb: Once the fire is hot and going well, burn only three large pieces at a time—two on the bottom with one laid across the top.
- Remember: A good campfire thrives on dry, dead wood positioned with ample ventilation between the pieces. Fire is in the spaces!
Campfire Packing List
- Campsaw. Many inexpensive and easy-to-use camp saws are sold by outdoor stores and the outdoor sections of superstores. $25 to $45. A classic is the Sven Saw.
- Matches and/or a lighter that works (check before you go.)
- Camp ax or maul to split logs and make kindling.
- Bucket. (To hold water.)
- Fire pan or portable pit. A metal hubcap, gold pan or old broiler tray will work, especially if suspended off the ground on rods or wood. More elaborate models are sold by home improvement and outdoor stores.
- Wood container. Firewood can be messy! To keep scattering bark and dirt inside our vehicles, we often stash our campfire fuel in household storage tubs or totes. A cardboard box or even a small trash receptacle works too.


